My trolley
My trolley

Items added to your trolley will appear here

Sub-total £0.00

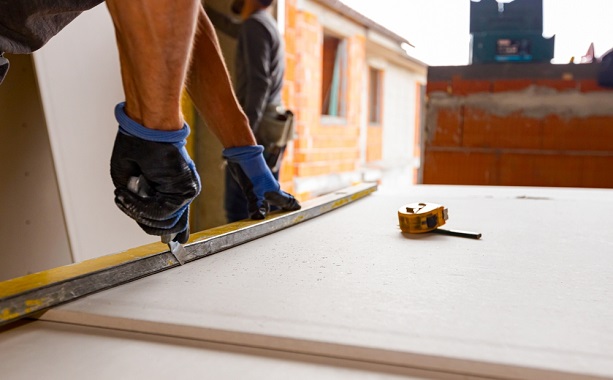
How to cut plasterboard effectively

While it is strong, plasterboard is an easy material to cut. The aim is to achieve the straightest and, more importantly, the cleanest cut. You will need to cut through the gypsum core and two lining layers.

Let’s look at the best process for cutting plasterboard.

Prepare the area

A clear, unobstructed area is vital before you begin cutting your plasterboard. You will need plenty of space and a flat surface to cut your plasterboard. Cutting your plasterboard will inevitably create a lot of dust, so remove any furniture from the room and lay out dust sheets on the floor.

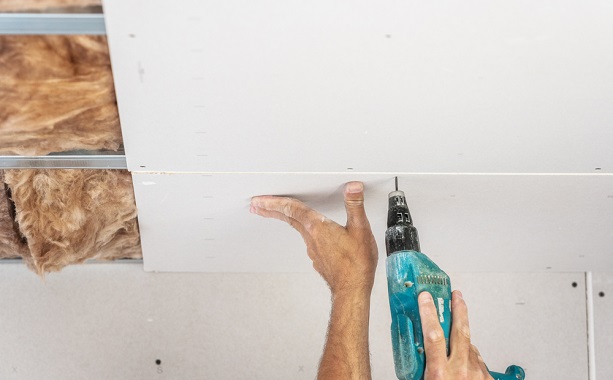
Choose your fixing methods

There are four methods used to fix plasterboard to a wall. You can either:

  • nail the plasterboard to the studs to cover a large area quickly
  • screw the board to studs or battens for a more secure installation
  • glue pre-insulated plasterboard to a wall
  • use the dot and dab method. Apply plasterboard adhesive to the back of the sheet and press it firmly into place. It’s a quick, easy, and cost-effective option for smaller areas. The dot and dab technique is implemented when there is no stud wall to screw or nail the plasterboards.
     
Cutting plasterboard

Cutting plasterboard in a straight line

  1. Grab your tape measure and measure the cut you need to make on the ceiling or wall you’re plasterboarding. Leave around 12mm of space to guarantee the plasterboard will fit.
  2. Mark this length on the plasterboard using a pencil and spirit level to ensure the line is straight.
  3. Lay the plasterboard flat and cut it with your knife using the scoring and snapping technique. Keep your fingers out of the way and regularly check the cut for accuracy. 
  4. Stand the plasterboard on its side and bend it away from the cut. The board should split neatly along the line as you fold it.
  5. At the fold, still connecting your board, use your Stanley knife to sever the back face of the plasterboard holding it together. The two sides should separate easily.
  6. Neaten any rough edges by lightly running your plasterboard rasp or sandpaper up and down the sides.

Create cutouts and openings

You will need to cut holes in your plasterboard for electrical outlets and light fittings. Use a handsaw to create a hole or opening. It can be a good idea to use an older or inexpensive saw as it can quickly dull the teeth.

A jab saw (also known as a plasterboard saw) can also be used. Long and narrow with a pointed tip, it’s efficient for making small cuts in awkward areas.

  1. Accurately measure the cut you need to make.
  2. Mark the cut with a pencil.
  3. Hammer a hole using your plasterboard hammer. The hole needs to be 50mm inside the cut lines so you have a gap you can see from.
  4. Insert your saw into the gap and begin cutting along the lines you have made to form a hole.
     
Securing plasterboard

Secure your plasterboard

Now your plasterboard has been cut to the desired shape, it’s ready to be fixed to the wall or ceiling. Nails or screws are the two most popular ways to fix plasterboards. If using nails, choose galvanised ones to protect against rust.

  1. Line up the board to the wall or ceiling. Use a spirit level to ensure it’s straight. Be extra careful with the position of the first plasterboard, as it will need to sit 100% straight, allowing the others to fit flush against it.
  2. Begin by slowly drilling or nailing screws into the corners of the plasterboard. Only drive them in enough, so they break the paper’s surface. Any further could impact the plaster and prevent a secure fix.
  3. Keep a gap of 150mm or more between the screws or nails. They should also be positioned at least 12mm away from the board edge.
  4. Keep drilling or screwing until the plasterboard has zero movement.

Finish and sanding

Apply drywall tape or joint compound on the joints to cover up any gaps between the plasterboards. 

Joint compound can be spread evenly with a taping knife or putty knife. Once it’s dry, use sandpaper to smooth out any rough patches. Your plasterboard is then ready to be painted or wallpapered.

How to deal with corners and joints

L shapes and corner cuts can be tricky. You will first need to cut one line (usually the shortest) with a handsaw. For the other, you can use the trusty score and snap method to cut your straight edge.

Remember, if the plasterboard isn’t adequately secured to the wall or ceiling, it can affect performance and lead to moisture buildup.

Don’t forget every project is different. Products, materials and services that we mention may not be suitable. Where necessary, work should be carried out by a qualified professional. We recommend seeking expert advice if needed, and following manufacturers instructions. Don’t forget to check your work is compliant with any relevant laws or regulations.

Popular articles